Total Posts 191 Last Updated 23 November 2015 12:00 PM (GMT +8)
Wednesday, September 01, 2010
The Birthday Cake: Beautiful and Innocent?
Now if you're wondering why my birthday cake was not made exactly in time for the actual event, well... a few things came along forcing me to only get to it last weekend. First of, on the weekend before the birthday there's the deadline for the recipe testing. The next day my wisdom tooth drove me literally running to the dentist to have it removed - I shall not bore you with the gruesome details since we are really just concerned about this cake now aren't we?
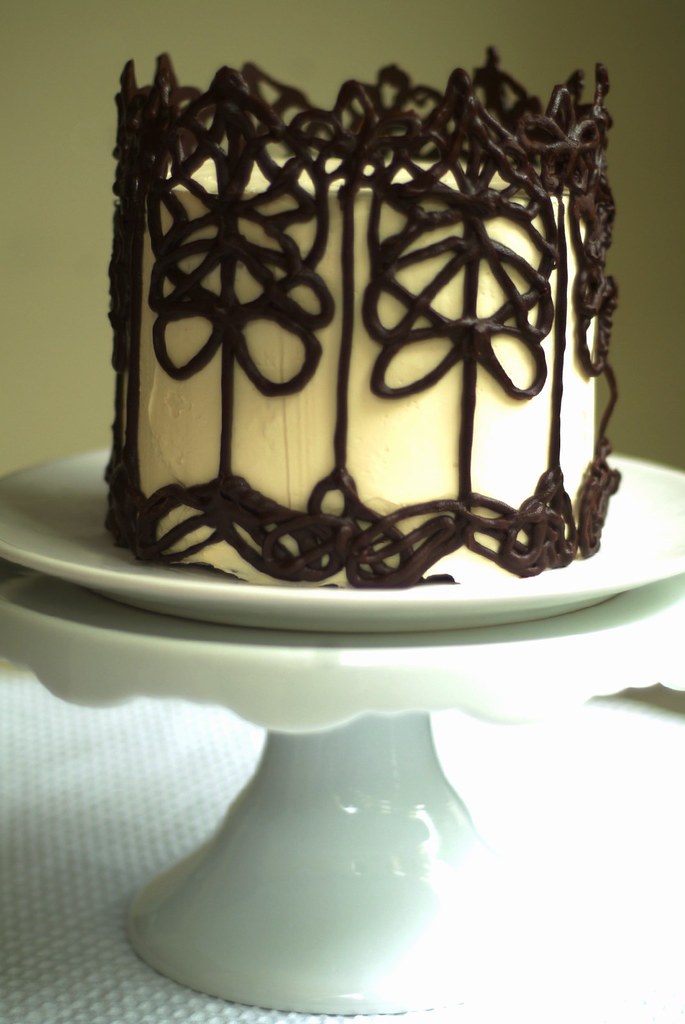
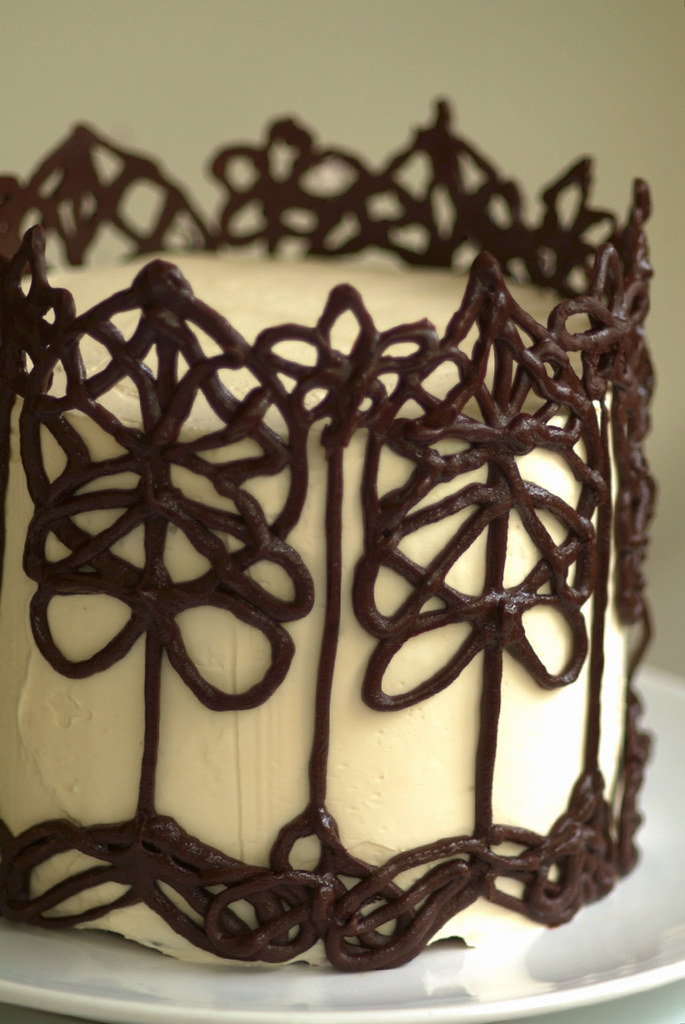
To celebrate the day I get yet another year older, it is only fitting that I bake my own cake, especially since this was given to me months ago as an early present (muaks baby!!). It can't just be any other cake as well. If I'm going to go through so much trouble, the product to end up on that beautiful cake stand Najah got me (thanks dear!!) better be delicious, pretty and giving the much required 'Ta da!' effect of a celebration cake.
The scheming of what cake to make went by as I nimbly devoured Vijay's awesome chicken pot pie and out-of-this-world mushroom soup on the big night. Swollen gums, painkillers and a few stitches didn't stop me from going through cake recipes and planning the baking schedule in detail. Being a girl who knows what she wants, I knew I wanted the cake to be made with Valrhona chocolate and the frosting to be Swiss meringue buttercream.
Hence it came down to deciding between Smitten Kitchen's chocolate butter cake (which I bookmarked when I gawked at her ability to bake a wedding cake) and Poires au Chocolat's The Beautiful and the Damned Cake.
It was a tough choice. Deb's cake being more moist and chocolaty and Emma's cake obviously incredibly stunning but lighter on the chocolate. In the end, I decided on the beautiful cake but decided to free it from being damned. I love the flavor combination of chocolate and mint - one of my favorite chocolate is Andes. The whisky syrup was replaced with peppermint syrup and more peppermint was added to lace the dark chocolate ganache between the cake layers.
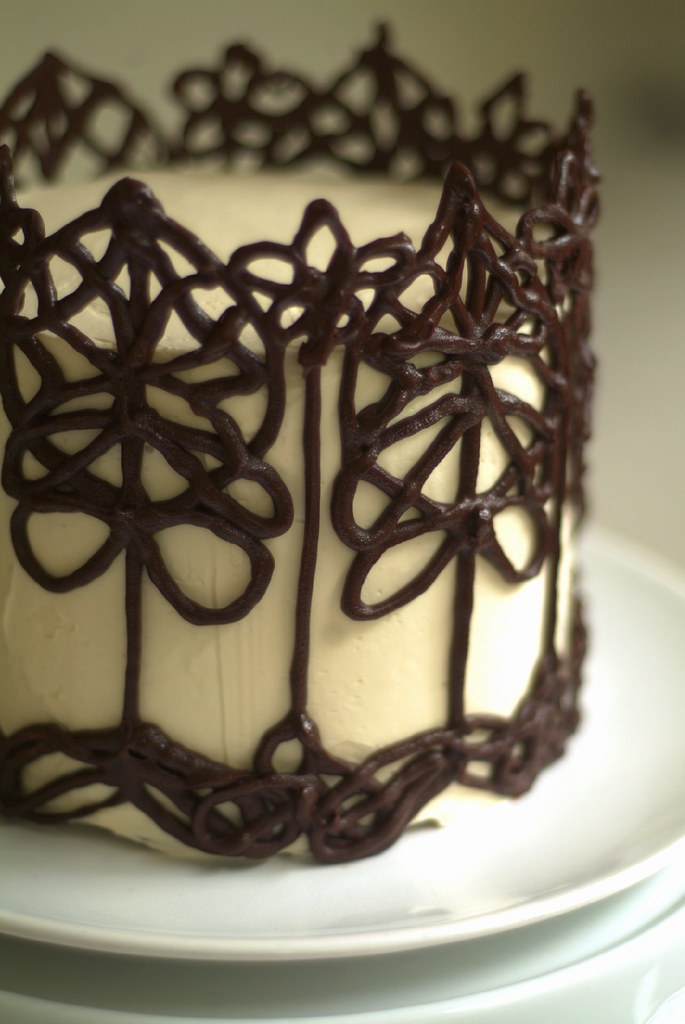
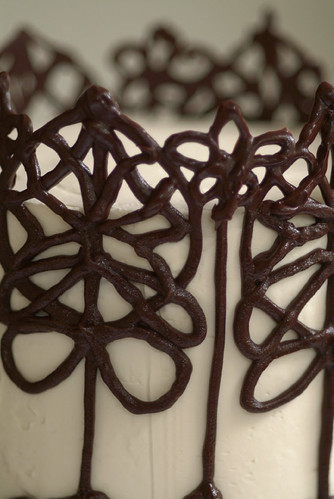
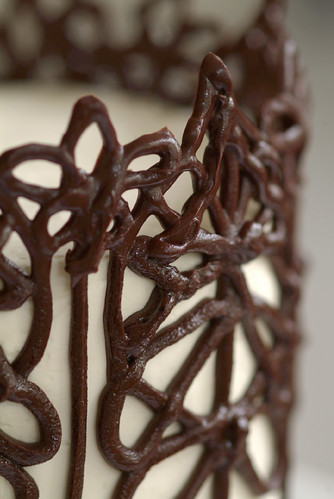
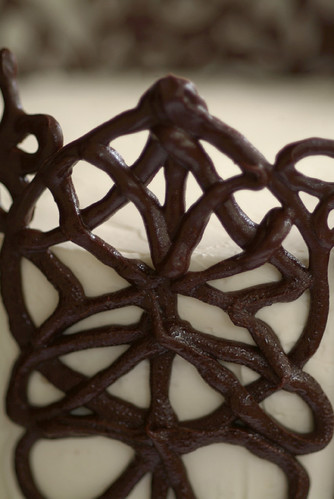
Everything up to the initial chocolate decoration bit went smoothly. I used Valrhona chocolate as well for the art deco design but didn't patiently wait for the piped out designs to harden at room temperature. Popping them into the freezer hardened the outsides enough for me to stick them to the cake but while working on the final portion of the deco a small corner of the filigree already on the cake collapse onto (gasp!) the buttercream frosting. All worked up from this little mishap, a bigger one followed up.
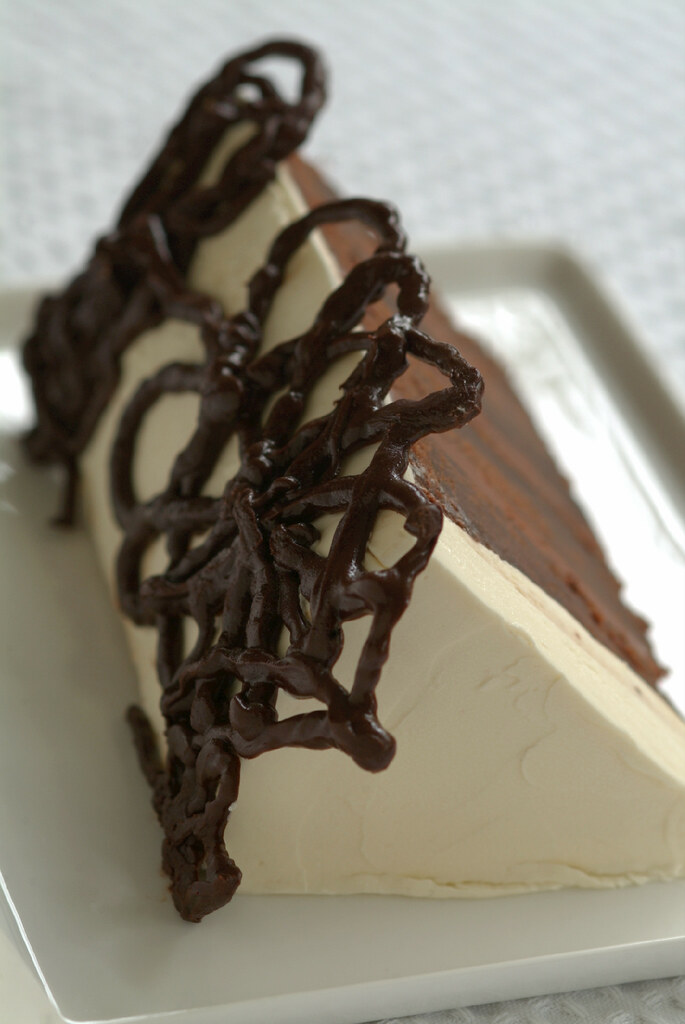
I dropped the cooled final section of chocolate into the sink in the process of transferring it to the cake. Vijay heard my crazy yelp and it took all my sanity to melt more chocolate and complete the challenge which I decided on. By midnight the cake was done. It turned out better than I expected, rich and not dry despite the limited ingredients. The huge piece we cut above quickly disappeared, leaving us wanting more while inhaling the strong Valrhona scent filling our flat from the cake stand.
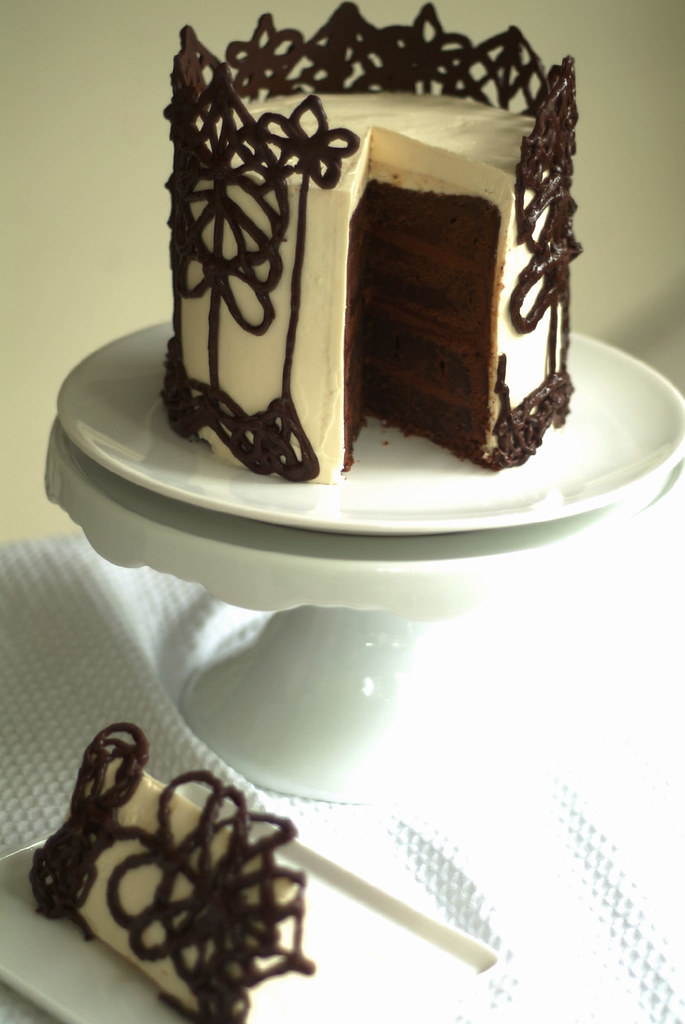
This is definitely the kind of celebration cake I will make again soon.
Dark Chocolate Peppermint Cake
Adapted from Poires au Chocolat's Whisky and Dark Chocolate "The Beautiful and the Damned" Cake.
I used peppermint extract in place of the alcohol and Valrhona 72% chocolate discs for all the chocolate elements in this recipe, including the decoration. Peppermint extract contains a strong menthol fume, use sparingly to avoid overpowering the cake.Chocolate Cake
- 250 grams butter
- 300 grams soft brown sugar
- 100 grams plain flour
- 100 grams self raising flour
- 5 eggs
- 300 grams dark chocolate (85%)
Peppermint Syrup- 50 milliliters peppermint extract
- 100 grams golden caster sugar
- 100 milliliters water
Peppermint Dark Chocolate Ganache- 100 grams dark chocolate (85%)
- 125 milliliters double cream
- 1-2 tablespoons peppermint extract, to taste
Swiss Meringue Buttercream- 2. 5 egg whites (I used 3 without incident)
- 120 grams caster sugar
- pinch of salt
- 220 grams butter, at room temperature
- 1 teaspoon vanilla extract
Make the chocolate cake: Preheat the oven to 150°C. Butter and line the tin (all in one 20cm, or I halved the recipe between two 15cm tins). Melt the chocolate and set aside to cool slightly. Beat together the butter and soft brown sugar until fluffy. Measure out the flour into a bowl. Add the eggs one by one, adding a tbsp of flour between each addition.
Pour in the chocolate, beating at the same time. Fold in the flour. Spoon into the tin(s) and smooth the tops. Bake for about 1 hr 20 for a larger cake or 1hr for two smaller ones - check with a skewer. Spike the top of the cake and brush with peppermint syrup. Let cool then remove from the tin.
Split each cake into two and brush the insides/bottom with more peppermint syrup. Leave to sink in then use or wrap in cling film and freeze till later.
Make the peppermint syrup: In a heavy saucepan, heat the water and sugar. Stir until the sugar has dissolved and continue stirring until the syrup has slightly thickened. Remove to a bowl/jug to cool, add the peppermint extract. Brush over cake layers as above.
Make the ganache: Chop the chocolate up finely and put in a bowl. Heat the cream until nearly boiling then pour over the chocolate. Leave for a few minutes then stir well until you have a smooth ganache. Add the peppermint extract to taste, taking care not to add to much.
Make the Swiss meringue buttercream: To halve an egg white, mix slightly with a fork before measuring out by sight. Combine the egg whites, sugar and salt in a heatproof bowl over a pan of simmering water. Whisk frequently, keeping it over the heat, until the mixture reaches 160°F/70°C and the sugar has dissolved (rub some between your fingers - if it feels grainy, it hasn't dissolved).
Transfer the mixture to a mixer with a whisk attached and beat on medium-high for 8 minutes, until stiff peaks have formed and the mixture has cooled to room temperature. Turn down the speed to medium and start adding small chunks of butter, checking that it has incorporated before adding more. Keep beating until it comes together, after about 5 minutes. Stir in the vanilla extract.
Assemble the cake: Place strips of baking parchment on your serving plate in a square, to cover the plate. Put the first layer of cake in the middle, then smear on 1/3 of the ganache. Repeat until you reach the top. Fill in any gaps on the sides so that the cake and filling is a perfect cylinder and there are no gaps between layers.
Chill in the fridge while you make the buttercream for about half an hour. Remove about 1/4 of the butter cream to a plate and use a palette knife to create a thin crumb coat. Put in the fridge for another half an hour or so to firm. Scrape all the rest of the icing onto the top of the coat and use the palette knife to drag it down and create and even layer of icing over the cake.
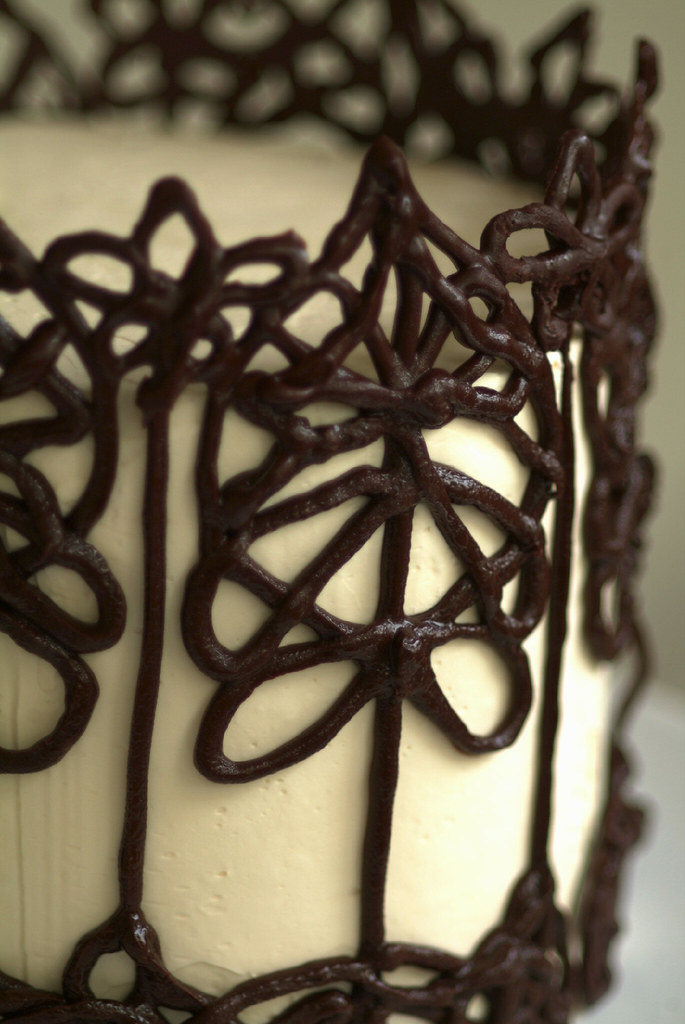
Prepare the decoration: Divide the patterns into three sections of 6 inches each. Melt the chocolate using a microwave or over a double boiler, taking care not to overheat it. Pipe out the design onto baking parchment masking taped over the drawn design using a plastic piping bag with the end snipped off.
Let the chocolate harden slightly at room temperature (don't do what I did), then put it into a microwave or preheated oven for a few seconds till it has melted. Leave for a few seconds then bend over a similar curve to your cake - I used a Milo tin. Leave to cool. Remove from the paper carefully and press lightly into the icing. Repeat with the other two sections until you have a full circle.


Life Is Great explores the incredible world of food and cooking. We hope to share with you our most delicious moments and inspirations.
“Just like becoming an expert in wine–you learn by drinking it, the best you can afford–you learn about great food by finding the best there is, whether simply or luxurious. The you savor it, analyze it, and discuss it with your companions, and you compare it with other experiences.”
Julia Child (Mastering the Art of French Cooking)
“Life is short. Live your dream and share your passion.”
RESOURCES
RECIPES

CAKE ORDERS

EATING OUT
FOOD READS
SUBSCRIPTION
RECENT RECIPES
- Gooey Cinnamon Cake
- Chinese Crispy Roast Pork Belly (Siu Yuk 烧肉)
- ABC Soup (罗宋汤)
- Kong Bak Pau (扣肉包)
- Pandan Chiffon Cake (Improved)
- Crispy Fried Egg
- Tamago Kake Gohan (卵かけご飯)
- Strawberry Pie
- One Pot Chicken Rice
- Bak Chor Mee (肉脞面 - Minced Pork Noodle)
- Hakka Salted Egg Steamed Pork (咸蛋蒸猪肉)
RECENT TRAVELS
- Hong Kong Part III
- Hong Kong Part II: Zongzi/Bakchang (粽子/肉粽)
- Caffè HABITŪ (the table) at G.O.D. Causeway Bay, Hong Kong
- Hong Kong Part I
- Australia 2010 Part 1: Melbourne
- Bourke Street Bakery, Sydney
- Il Fornaio, St Kilda
- Queen Victoria Market, Melbourne
ARCHIVES
FEEDBACK
Recent Comments
13 Comments on The Birthday Cake: Beautiful and Innocent?
Wow! Wow! Wow! What a BEAUTIFUL cake!
Posted by Crepes of Wrath, at
Feb 3, 2012, 10:14:00 AM
Crepes of Wrath, at
Feb 3, 2012, 10:14:00 AM
Crepes of Wrath: you should try it.
Posted by PickYin, at
Feb 3, 2012, 10:14:00 AM
PickYin, at
Feb 3, 2012, 10:14:00 AM
wow, this looks fantastic, well done
Posted by thagn @ noodlies.com, at
Feb 3, 2012, 10:14:00 AM
thagn @ noodlies.com, at
Feb 3, 2012, 10:14:00 AM
Thanks thagn, it's delicious.
Posted by PickYin, at
Feb 3, 2012, 10:14:00 AM
PickYin, at
Feb 3, 2012, 10:14:00 AM
It looks great! I love the flavour change - if I'm honest, I'm not a huge whisky fan.
Posted by Emma @ Poires au Chocolat, at
Feb 3, 2012, 10:14:00 AM
Emma @ Poires au Chocolat, at
Feb 3, 2012, 10:14:00 AM
Thanks for the inspiration Emma, I can't wait to try the caramel cake with the butterfly on top!
Posted by PickYin, at
Feb 3, 2012, 10:14:00 AM
PickYin, at
Feb 3, 2012, 10:14:00 AM
Super awesome looking cake! Your decorating skills are clearly much more advanced than mine.
Loving the flavour combo too - chocolate and mint (heck anything with mint OR chocolate) is always a winner in my book.
Posted by Marisa, at
Feb 3, 2012, 10:15:00 AM
Marisa, at
Feb 3, 2012, 10:15:00 AM
Thanks Marisa, you can try it too. It's not too difficult, just time consuming.
Posted by PickYin, at
Feb 3, 2012, 10:15:00 AM
PickYin, at
Feb 3, 2012, 10:15:00 AM
This sounds totally amazing. I love mint and chocolate... and I agree- Andes chocolates are pretty wonderful! And your decorating is great- the chocolate around the cake is beautiful.
Posted by Caitlin, at
Feb 3, 2012, 10:16:00 AM
Caitlin, at
Feb 3, 2012, 10:16:00 AM
Thanks Caitlin, try it and let me know how it turns out for you.
Posted by PickYin, at
Feb 3, 2012, 10:16:00 AM
PickYin, at
Feb 3, 2012, 10:16:00 AM
that looks amazing! I would love that for my birthday too! I guess I'll have to plan to bake it...mine is in November!
Posted by cakebrain, at
Feb 3, 2012, 10:16:00 AM
cakebrain, at
Feb 3, 2012, 10:16:00 AM
Great! Let me know how it turns out for you.
Posted by PickYin, at
Feb 3, 2012, 10:16:00 AM
PickYin, at
Feb 3, 2012, 10:16:00 AM
You're brilliant, I'm very impressed! Gosh, you should sell your work as art pieces!!!
Posted by foodpippa, at
Mar 13, 2012, 6:38:00 AM
foodpippa, at
Mar 13, 2012, 6:38:00 AM
Post a Comment