Monday, May 27, 2013
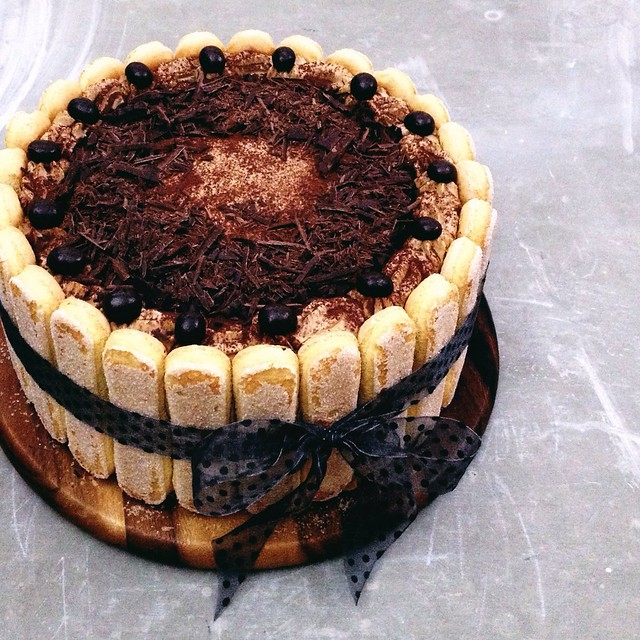
Tiramisu Cake (Encore)
Change, uncertainties, challenges.
What is life without these?

Falling into a prolonged period of complacency only makes one forget, weak and lazy. Tests in practical experiences are to be expected, and those who face them with patience shall be rewarded.
"And it may be that you dislike a thing, which is good for you and that you like a thing, which is bad for you. God knows but you do not know."

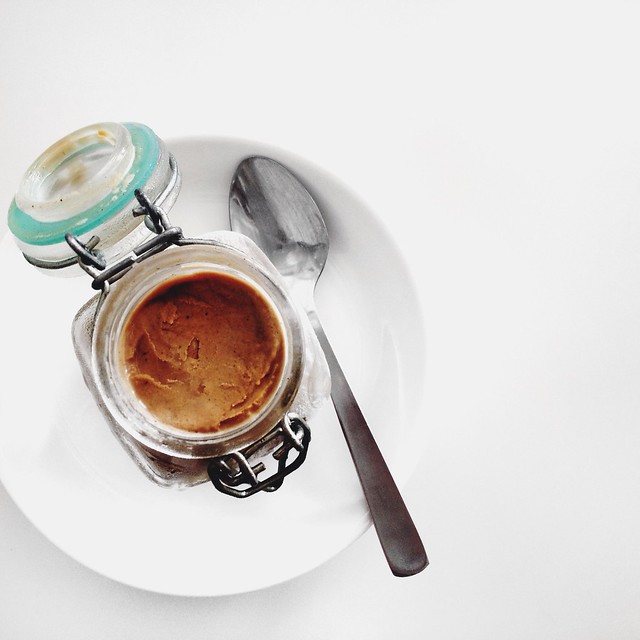


Weeks were spent away from the kitchen, not wanting weariness and fear to get in the way of things coming out of my homemade haven. But as other things were decreed in life, soon the heart and soul went back to chocolate, coffee, cream and eggs; drawing strength from hours of undivided focus, rewarding the fighting spirit when eye lit up and sighs let out over simple joys of sweet offerings.
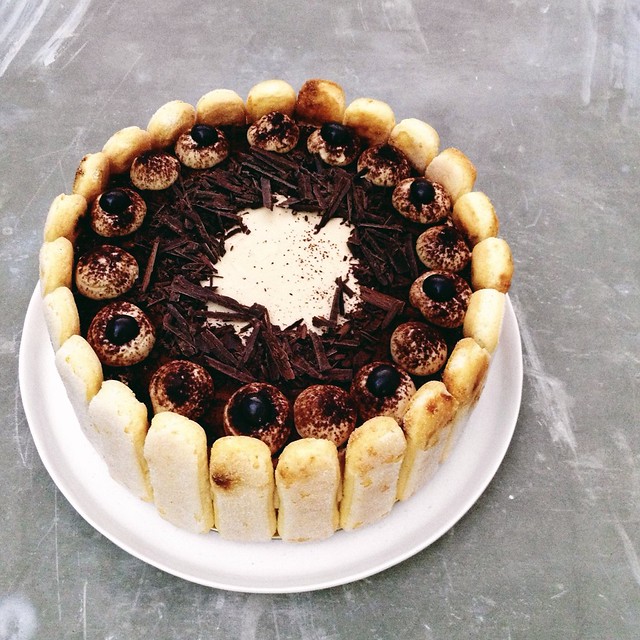
When tomorrow becomes today, the only way is to look forward and take heed the lessons learnt from yesterday.
Tiramisu Cake (Encore)
Similar to this recipe, with minor adjustments.
Yield one 8" 3-layer cake.
Note: Changes made to the recipe - no alcohol here, as a true Italian will tell you the original tiramisu is without any liqueur. I tripled the espresso extract, doubled the syrup and amount of mascarpone cream for ample usage in the frosting and filling. To me this 3-layered cake with more cream in between resembles the classic tiramisu more.
For the cake layers:For the espresso extract:
- 2 cups cake flour
- 2 teaspoons baking powder
- 1/8 teaspoon baking soda
- 1/4 teaspoon salt
- 1 1/4 sticks unsalted butter, room temperature
- 1 cup sugar
- 3 large eggs
- 1 large egg yolk
- 1 1/2 teaspoons pure vanilla extract
- 3/4 cup buttermilk
For the espresso syrup:
- 6 tablespoons freshly brewed strong espresso
- 6 tablespoons good quality instant coffee/espresso powder
For the filling and frosting:
- 1 cup water
- 2/3 cup caster sugar
- 2 8-ounce containers mascarpone
- 1 cup confectioners’ sugar, sifted
- 3 teaspoons pure vanilla extract
- 2 cups cold heavy cream
- 3 ounces bittersweet or semisweet chocolate, finely chopped, or about 1/2 cup store-bought mini chocolate chips
- Chocolate-covered espresso beans, for decoration (optional)
- Sifted cocoa powder, for dusting
- Savoiardi biscuits, for decoration (optional)
Getting ready: Center a rack in the oven and preheat the oven to 180°C/350°F. Butter 3 9×2 inch round cake pans, dust the insides with flour, tap out the excess, and line the bottoms of the pans with parchment or wax paper. Put the pans on a baking sheet.
To make the cake: Sift together the cake flour, baking powder, baking soda, and salt. Working with a stand mixer, preferably fitted with a paddle attachment, or with a hand mixer in a large bowl, beat the butter on medium speed until soft and creamy. Add the sugar and beat for another 3 minutes. Add the eggs one by one, and then the yolk, beating for 1 minute after each addition. Beat in the vanilla; don’t be concerned if the mixture looks curdled. Reduce the mixer speed to low and add the dry ingredients alternately with the buttermilk, adding the dry ingredients in 3 additions and the milk in 2 (begin and end with the dry ingredients); scrape down the sides of the bowl as needed and mix only until the ingredients disappear into the batter.
Divide the batter evenly between the 3 pans and smooth the tops with a rubber spatula. Bake for 15 to 20 minutes. When fully baked, the cakes will be golden and springy to the touch and a thin knife inserted into the centers will come out clean. Transfer the cakes to a rack and cool for about 5 minutes, then run a knife around the sides of the cakes, unmold them, and peel off the paper liners. Invert and cool to room temperature right-side up.
To make the extract and syrup: Stir the espresso/coffee powder and and brewed espresso together in a small cup until blended. Set aside. For the syrup, stir the water and sugar together in a small saucepan and bring just to a boil. Pour the syrup into a small heatproof bowl and stir in 3 tablespoons of the espresso extract, set aside.
To make the filling and frosting: Put the mascarpone, sugar, and vanilla in a large bowl and whisk just until blended and smooth. Divide the mixture into two bowls. In one of the bowls, add in 2 tablespoons of the espresso extract and stir well till combined. Working with the stand mixer with the whisk attachment or with a hand mixer, whip the cold heavy cream until it holds firm peaks. Switch to a rubber spatula and divide the whipped cream into two parts. Keep one of the portion in the fridge.
Stir about one quarter of the other portion into the coffee mascarpone. Fold in the rest of the whipped cream with a light touch. Remove the other half of the whipped cream from the fridge and repeat the same process with the regular vanilla mascarpone cream. Return both creams into the fridge for 30-45 minutes or until thick enough to spread.
To assemble the cake: Using a pastry brush or a small spoon, soak all the cake layers on both sides generously with the espresso syrup. Let stand for about 15 minutes. Prepare the cake board or serving platter with strips of baking paper around the edges. Place one cake layer, brush on some of the remaining espresso extract. Remove the vanilla mascarpone cream from the fridge, spread half of it on the cake layer, being careful to keep within 3/4 inch from the edges. Spread half of the chopped chocolate onto the filling. Repeat with the second layer of cake, espresso extract, remaining vanilla mascarpone cream and chopped chocolate. Top with the final cake layer and brush on any remaining espresso syrup.
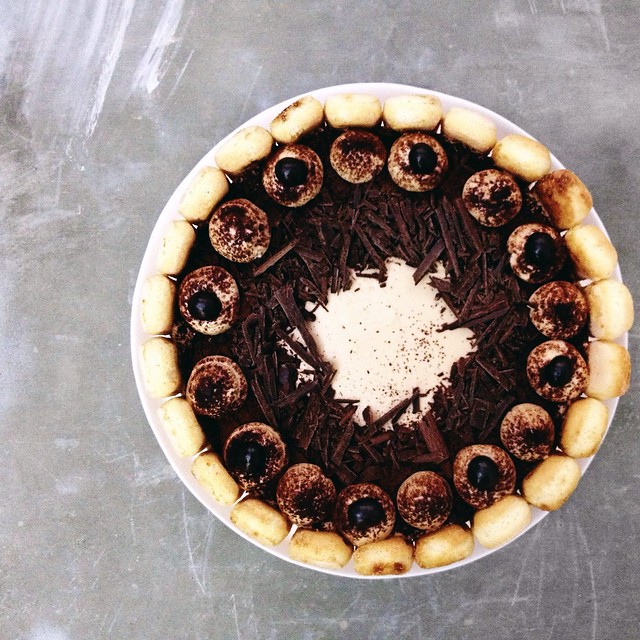
Press the assembled cake gently to ensure all the layers attach well, refrigerate for 15 minutes. Remove both cake and the espresso flavored mascarpone cream. With a long metal icing spatula, smooth the frosting around the sides of the cake and over the top. Return the iced cake and any remaining frosting to the fridge for another 20 minutes before proceeding with the final decoration. For this cake, I spread over a circle of finely chopped dark chocolate on the top, then piped on the remaining espresso mascarpone cream before sifting over some cocoa around the piped frosting and decorating with chocolate covered espresso beans.
Refrigerate the cake for at least 3 hours (or for up to 1 day) before serving – the elements need time to meld.
Life Is Great explores the incredible world of food and cooking. We hope to share with you our most delicious moments and inspirations.
“Just like becoming an expert in wine–you learn by drinking it, the best you can afford–you learn about great food by finding the best there is, whether simply or luxurious. The you savor it, analyze it, and discuss it with your companions, and you compare it with other experiences.”
Julia Child (Mastering the Art of French Cooking)
“Life is short. Live your dream and share your passion.”
- Gooey Cinnamon Cake
- Chinese Crispy Roast Pork Belly (Siu Yuk 烧肉)
- ABC Soup (罗宋汤)
- Kong Bak Pau (扣肉包)
- Pandan Chiffon Cake (Improved)
- Crispy Fried Egg
- Tamago Kake Gohan (卵かけご飯)
- Strawberry Pie
- One Pot Chicken Rice
- Bak Chor Mee (肉脞面 - Minced Pork Noodle)
- Hakka Salted Egg Steamed Pork (咸蛋蒸猪肉)
- Hong Kong Part III
- Hong Kong Part II: Zongzi/Bakchang (粽子/肉粽)
- Caffè HABITŪ (the table) at G.O.D. Causeway Bay, Hong Kong
- Hong Kong Part I
- Australia 2010 Part 1: Melbourne
- Bourke Street Bakery, Sydney
- Il Fornaio, St Kilda
- Queen Victoria Market, Melbourne

3 Comments on Tiramisu Cake (Encore)
hi PickYin, so when do we get to see the wonderful cookbook of yours. Will it be made available in bookstores in Malaysia and on Amazon as well?
Posted by Iza, at
May 27, 2013, 4:55:00 PM
I have never tried Tiramisu before! Sad to say. I definitely need to remedy that soon. :)
Posted by Unknown, at
Jan 7, 2015, 1:34:00 PM
Made this now twice and with modifications, wow! I found the cake too dense and dry, did not soak up syrup, personal preference.
I made the equivalent of pound cake and they were moist and yummy. I cooked the syrup longer until it started to thicken and made a difference when adding to espresso, this dessert is definitely worth the effort. Thank you!
Posted by Anonymous, at
Jun 16, 2017, 7:22:00 AM
Post a Comment