Total Posts 191 Last Updated 23 November 2015 12:00 PM (GMT +8)
Sunday, May 23, 2010
Chicken Burger
It's Sunday afternoon and I finally have a little time for some update. Workdays generally leave me exhausted by sundown and Wednesday had been hellish.
However, why focus on the bad bits right? I have at least one reason to rejoice.
Yesterday, the new oven (finally!!!) and cabinet have been set up (albeit some minor issues with missing drawer dampers and the top door knocking against the ceiling light when opened). I have patiently ran through four cycles of burn off to get rid of its funky smelling fumes. After this I hope to find a good roasting pan and try this next weekend. Also, I got this trolley to create a mobile counter (note to self - keep the top empty always.)

Onto this whole burger business now.
How did this come about? I'm not a fan of burgers but on one of our weekends out we landed at this place out of curiosity, extreme hunger and not wanting to walk further to Orchard Central to decide on lunch (objective of going to Orchard Central being The AFC Studio, which then brought me to dinner with Laura Calder next week!!!).
I had the first decent beef burger in my life (have not tried the ones at Las Vacas, which I suspect might be better) - the buns were soft and juices oozed from the perfect medium rare patty. Vijay, however, went on and on about how they don't make chicken burger out of patties anymore and instead just slap on a whole piece of chicken thigh. We then went into a detailed discussion involving me explaining the difficulty of creating a juicy chicken patty compared to other meats and him saying McDonald's (!!!) used to have a great Chicken Big Mac so why is it so difficult.


That conversation was left off where it ended but one night at about three in the morning I woke up with it in my head and later toyed with the idea to attempt a chicken burger patty. The day before I've shopped for a couple of deboned chicken thighs with the intention of pan-searing them, to be served with potatoes and mushroom sauce (done so many times but Vijay loves it). So while in the dark in bed, Google on iPhone led me to this site for some chicken patty chemistry guidance. With chicken it would be unrealistic to leave out binding agents so to compensate for flavor, using chicken stock is a brilliant idea. Panko breadcrumbs being drier than fresh breadcrumbs can be balanced by grinding a portion of it.

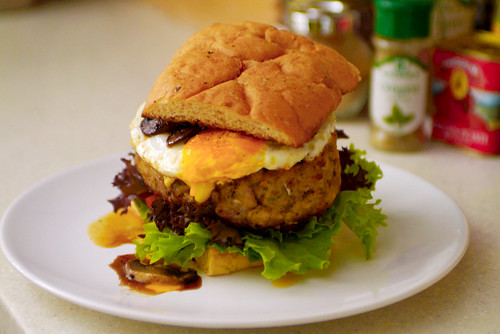
I also (couldn't help but) checked my favorite cooking blog for some possible adaptation. While shaping the patties, I decided to make oversized ones like those at Billy Bombers for some drama but in all my excitement to do so they turned out (just) a tad too big (as you can see from the photos, I couldn't finish mine and it takes forever to cook!).
This burger is all about the patty so I kept the condiments minimum and flavors light. Another tip for a juicier patty - chop the chicken by hand instead of food-processing it. Adjust the size of the patties to more level-headed portions and I promise you this recipe will be a bliss.

The patties turn out to be a success, juicy and full of flavor. Vijay's conclusion? The best chicken burger he ever had, comparable only to Burger King's (!!!!!!) Chicken Sandwich. Hmmppphhhh....
Chicken Burger
Generously adapted from Hamburger-Recipes.com's Basic Chicken Burger. Makes 2 very large or 4 normal size patties.
- 1 pound/500 grams chicken thigh meat ground or finely chopped
- 1 half onion finely chopped
- 2 cloves garlic finely chopped
- 1 tablespoon lemon juice
- 2 teaspoons sesame oil
- 2 teaspoons hot paprika powder
- 1 teaspoon nutmeg (I microplaned fresh from the nut)
- 2 teaspoons all spice powder
- 1 teaspoon dried rosemary
- 2 teaspoons dried oregano
- 2 tablespoons finely chopped parsley
- 2 tablespoons finely chopped coriander
- sea salt and freshly ground pepper to taste
- 1/2 panko bread crumbs (I blitzed half of it and kept the other half course)
- 3 large eggs, one of it lightly whisked for the patty
- 1/4 cup chicken stock (if not homemade, use 1 quarter chicken stock block dissolved in 1/4 cup water)
- 1 1/2 cups button mushrooms
- 2 focaccia bread slices, halved horizontally
- butter for the bread
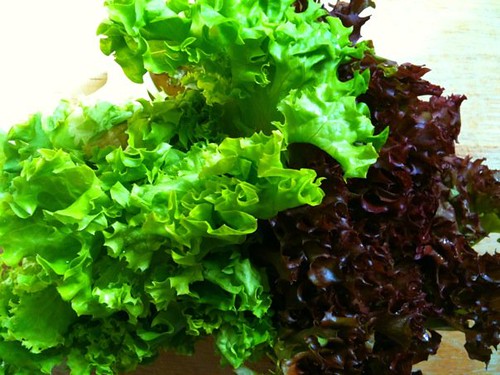
- some frisée and arugula leaves or any greens or your choice
- some cherry tomatoes
- 2 tablespoons of plum sauce dressing
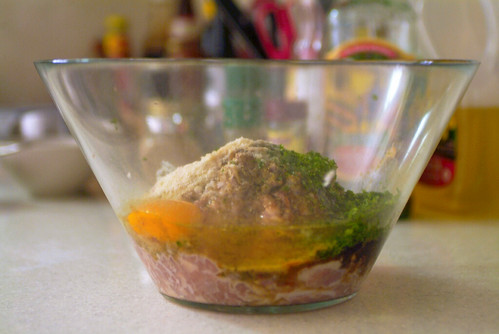
Mix all the patty ingredients (including one of the whisked egg and sesame oil) thoroughly, leaving the salt for after the patties are cooked if you prefer. For tastier result, leave the mixture in the fridge for a couple of hours to marinate. Make sure the mixture is very cold. Heat up a grill pan for 5 minutes on high flame. Meanwhile divide the mixture into 4 equal (or 2 large) balls and press into patties.
Turn down the heat to medium and place the patties on the pan. Let it sizzle and after a minute or two cautiously lift the edge of a patty near the center of the pan and take a peek. At this point lower the heat slightly to maintain the same degree of sizzle. If the pan is still too hot and the patties are in danger of burning flip them over and readjust the temperature.
For oversized patties ensure the sides of the patties are browned by pushing them against the sides of the grill pan. Cook until the patties are firm to touch and the juices run clear from its center or the internal temp reaches 175°F.
Remove the patties to rest on a wire rack or plate. Toss the mushrooms in the fat left from cooking the patties, seasoning accordingly. If necessary add a small knob of butter. Saute till brown and set aside.
Cook the eggs sunny side up according to preferred level of runny yolks, season with salt and pepper. I used egg rings here to maintain a good shape for the burger but if you have a smaller egg frying pan skip the rings to make it more rustic. Butter the focaccia slices and place on the grill pan, cut sides down. Rotate halfway for grill marks if preferred.
To assemble the burger, place the greens on the base focaccia slice, add the cherry tomatoes and 1 tablespoon of the plum sauce dressing. Add on the patty. Place the egg and add the sauteed mushrooms. Add on the top bun.


Continue reading Chicken Burger
Wednesday, May 12, 2010
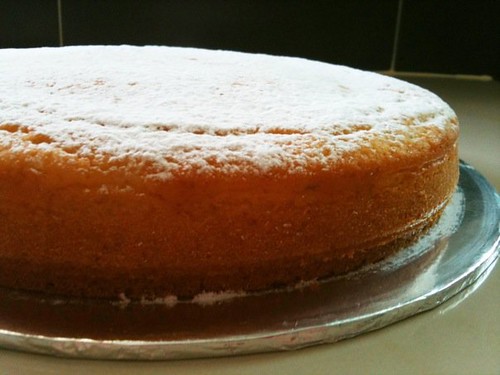
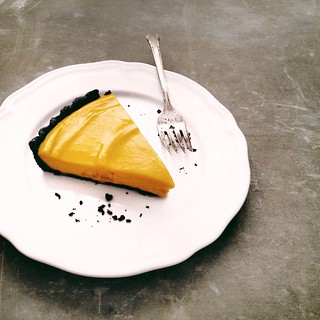
Lime Yogurt Cake with Blueberry Sauce
Before we get to the cake, let me digress, generously.
Today, this wackiest Wednesday in my life, nothing can go more wrong in my small world of making food and taking their photos. Lunch was supposed to be a simple fried rice topped with Kak Sarina's fried chicken. I managed to just sightly overcook the rice last night - I put it into the cooker sleepwalking in the kitchen at about 12:15 AM. This morning, without breakfast and any coffee for a kick start, the 50mm lens gave me a slight headache while I tried to muscle Vijay's Manfrotto tripod in front of the chopping board. Things went well with the fried rice until I started on the chicken.
The oil exploded out of my WMF pot onto the hob and the kitchen burnt oil for a few seconds before I turn off the stove. I suspect two things went wrong - the oil at 375 degrees for deep frying is not suitable for a piece of chicken drenched in oyster sauce, and the pot is not meant for deep frying. What ensued was chaos - wiping oil off the counter, binning the burnt chicken, finish frying the rice with oily hands, cleaning the dishes, washing the kitchen towels and... well, short of crying my heart out.
I wanted sunny side up eggs for the rice. The first one broke its yolk while going into the pan. There goes the photo op, I thought, but then there's still the second egg. Guess what? The second egg decided to also broke its yolk before even going into the pan. In frustration and a few expletives, I threw it into the trash (to throw away an edible egg? Yes I was in that bad a shape). The third egg worked, so I continued to wash the burnt pot, scrubbing like a mad woman. It wasn't until its fine edges left a small cut on my finger that I actually stopped, took a deep breath and tried to calm down. By this time Vijay was already back for lunch, fragrant fried rice going down his belly after I told him to do the photos.

That was that. Vijay says even the best cooks have their bad days. So let's talk about happier things shall we? I'm always a little disappointed in my disability to like healthy foodstuff - yogurt being one of them. How do people eat this thing like they're licking ice cream? I've tried to make blueberry smoothies with it and eat it with everything from nuts and fruits to chocolate. Nothing really worked, even the recent raspberry yogurt panna cotta, all pink and shiny but... blergh.


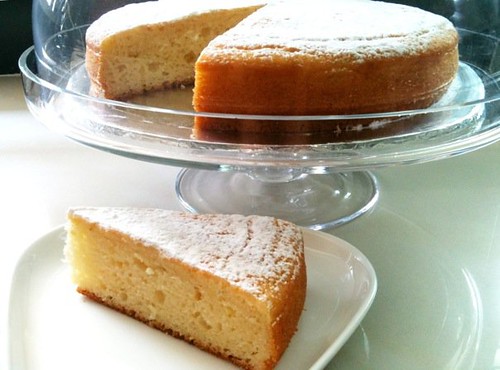
Then I found this cake. One of Deb's latest, I decided to give it a try. What helped me decide? It's simple to make, in one bowl. Did you get that? One bowl. No stand mixer, no greasy butter, no beating whatsoever. On the Friday before the weekend I left KL I made this and prayed I will like it. While it baked I sniffed, and sniffed more. The strong smell of yogurt still prevailed but once out of the oven, the refreshing aroma of lime took over and I resisted taking a bite until I made the sauce to go with it the next day.
It was a delicious ending to my three months break in KL. Even my mother who is quite adverse to the taste of anything dairy liked it. Half went to a friend's house to be gobbled up during the MU versus Liverpool match. *Sigh* for that chicken and egg in the bin. Do I really want to attempt fried chicken tomorrow? One day before going back to work, it's now or never!
Lime Yogurt Cake with Blueberry Sauce
Recipe from Deb Perelman of Smitten Kitchen
For the cake:
- 1 cup whole milk plain unsweetened yogurt (I used 2% Greek yogurt)
- 1/3 cup vegetable oil (olive oil works as well, for a slightly different flavor profile)
- 1 cup sugar
- zest of one lime
- 1/4 cup lime juice
- 2 eggs
- 1 2/3 cups all-purpose flour
- 1 1/2 teaspoon baking powder
- 1/2 teaspoon baking soda
- 1/8 teaspoon salt
For the sauce:
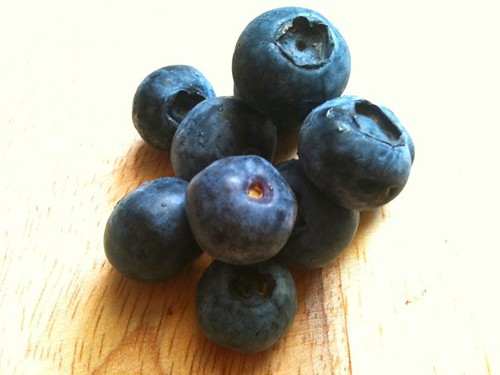
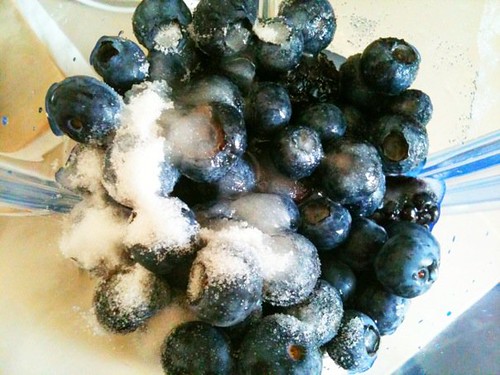
- 12 ounces fresh blueberries (frozen should work as well, but you should start with half the water)
- 6 ounces fresh raspberries
- 1/4 cup water
- 3 tablespoons sugar
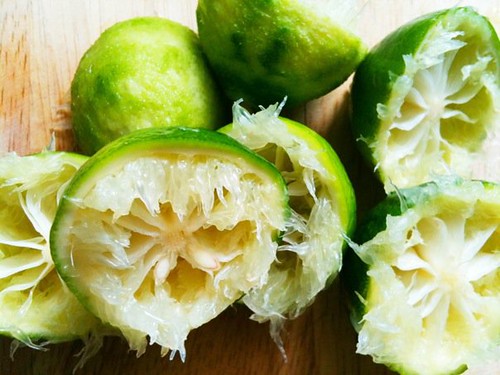
- 1 tablespoon fresh lime juice
Make the cake: Preheat the oven to 350 degrees. Grease the sides of a 9-inch round cake pan or springform pan with oil (I used a butter and flour spray out of habit, which works as well) and line the bottom with parchment paper if the pan is not springform.
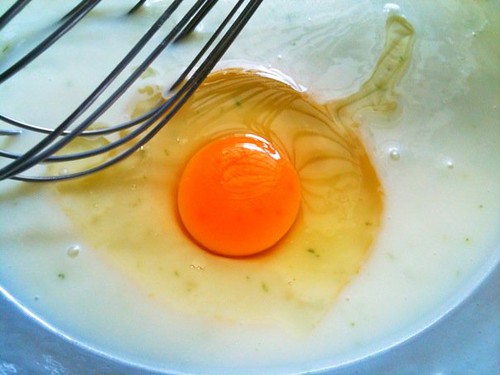
In a large mixing bowl, whisk together the yogurt, oil, sugar, lime zest and juice. Add the eggs one by one, whisking well after each addition. Sift flour, baking powder, baking soda and salt together, right over your yogurt batter. Stir with a spoon until just combined.
Pour the batter into the prepared cake pan and bake for 35 to 40 minutes, until the top is golden brown and a knife inserted in the center comes out clean. Transfer the pan to a cooling rack and let stand for 10 minutes. Run a knife around the pan to loosen. If you’re using the springform pan, unclasp the sides. Otherwise, flip the cake onto a plate and flip it back on the rack. Serve slightly warm or at room temperature.
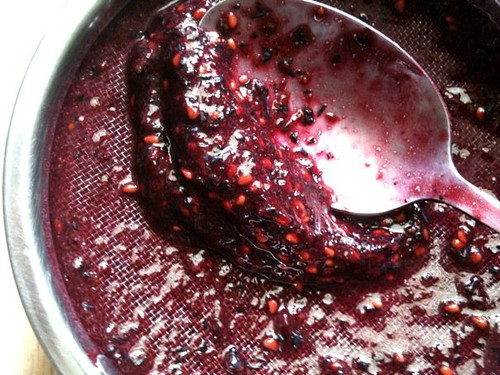
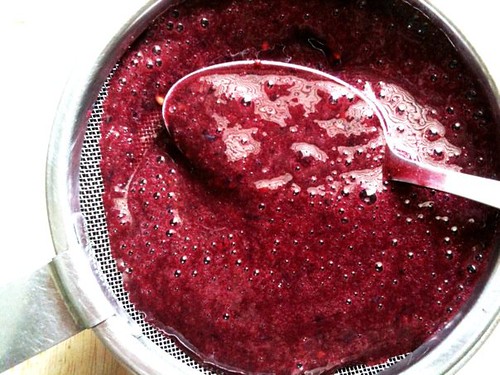
Make the sauce: Combine blueberries, raspberries, water, sugar and lime juice in blender or food processor. Purée until very smooth, then press through a fine mesh strainer to remove the seeds. Cover and refrigerate until cold.
Do ahead: I have indeed made this cake and kept it at room temperature covered for three days. Chilling is not required for storage, another plus point!


Continue reading Lime Yogurt Cake with Blueberry Sauce
Friday, May 07, 2010
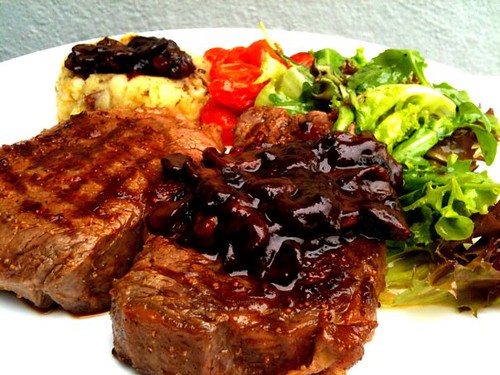
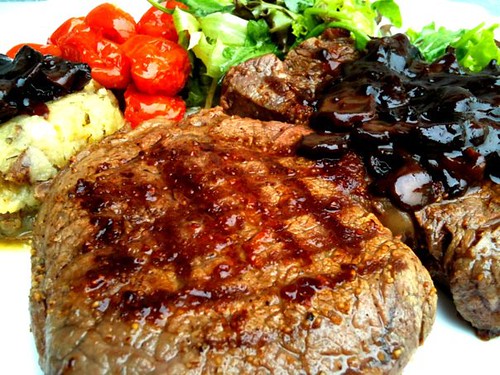
Simple Steak with Mushroom Sauce
I have never cooked beef in my life, ever. My mother dislikes the "smell" therefore family cooking is always safe from anything bovine. Since Vijay also doesn't eat beef, I have not found reason to cook a steak as much as I love to eat it.
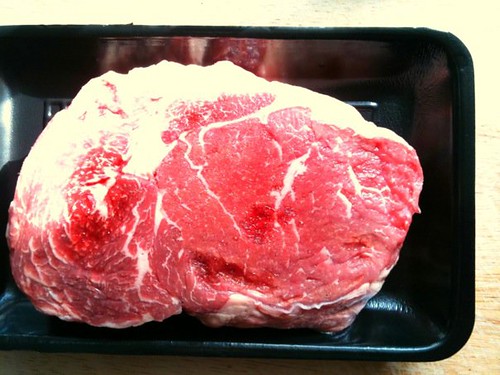
One weekend in KL saw me at Las Vacas (actually I demanded Farha to bring me there since I've heard so much about it from fellow steak lovers). The no-frills butcher impressed with freshly cut meat. The Australian wagyu striploin was excellently marbled and tender. I came home with piece of grass-fed ribeye and promptly schemed on how to cook it best.
I don't know what came over me but just to get the grill marks on my steak I went out to get a grill pan. Normally I'm more level headed and wouldn't
However, reviews of grill pan users have mentioned that since steaks don't sit directly in fat or liquid, it will give a crisper exterior. One even wrote - Don't underestimate the power of those grill marks! They send a subtle message that the food is "grilled." Remember, first we eat with our eyes, and it's widely acknowledged that this affects how we taste things. I am in agreement. Flavor wise there will be no difference as long as the pan is used on a regular gas stove.

A piece of meat this good calls for simplicity so for the method of cooking, I studied Jamie Oliver's 20 Minute Meals iPhone application (thanks to Najah) video "Cooking the Perfect Steak" (one more reason to love the phone).
For checking doneness I used both Jamie's time guide (according to steak thickness) and the finger test methods. The mushroom sauce is a self-invention repeated many, many times over chicken chops and mashed potatoes. On demand by the other half, the next artery chocking protein to be cooked may have something to do with lamb, after I find a very good way to cook it.
Simple Steak with Mushroom Sauce
Serves 2
For the steak:
- 2 slices of fresh quality beef cut of choice, roughly 300 grams each, between 1 inch to 1 1/2 inches thick
- freshly ground pepper
- sea salt to taste
- regular olive oil
- 1 small knob of butter
- 1 clove garlic, halved
- 1 stalk fresh rosemary
For the mushroom sauce:
- 1 1/2 cups mushrooms, field button or Swiss brown
- 1 1/2 cups chicken/beef stock or water
- 1 tablespoon Worcestershire sauce
- 1/2 tablespoon oyster sauce
- 2 tablespoons fresh cream (I used leftover sour cream, it worked well)
- salt and pepper to taste
For the steak: Heat up a griddle pan for up to 5 minutes over medium heat. While heating the pan, season the steak with sea salt, pepper and a little olive oil on both sides and toss well.
Place the steaks on the pan, flip every 1 minute or so until cooked to the doneness preferred (1 1/2 minutes on each side will yield steaks just under medium, as a guide). The second flip can be rotated slightly to create crisscross grill marks. If the side of the steaks are fatty, press the fatty side against the side of the pan to brown it.
About 1 minute before the steaks are done, rub the garlic and butter on the steaks. Pat the stalk of rosemary on the steak a few times. Repeat on the reverse side.
Remove steaks to rest on a plate for at least 5 minutes.
For the mushroom sauce: Meanwhile, toss in the mushrooms in the pan and saute over medium heat. Add a few drips of olive oil if the leftover fat from the steak is insufficient. After the mushrooms have browned slightly, deglaze the pan with stock/water.
Scrape the pan and around the sides well to incorporate all the leftover fond into the sauce. Add the oyster and Worcestershire sauces. At this point some juices may have been released by the resting steaks. Return those into the sauce as well. Mix well and add in cream. Let sauce thicken and season to taste.


Continue reading Simple Steak with Mushroom Sauce
Tuesday, May 04, 2010
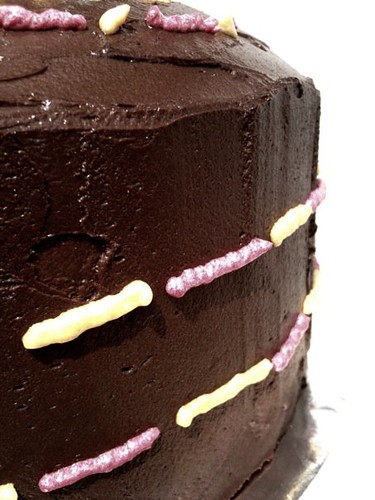
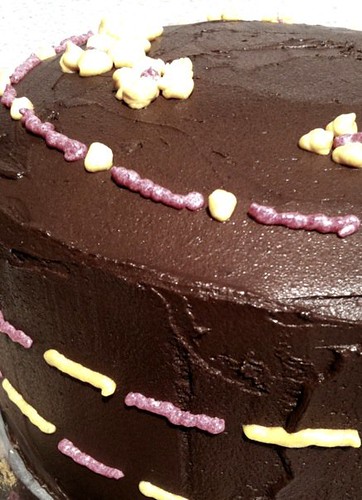
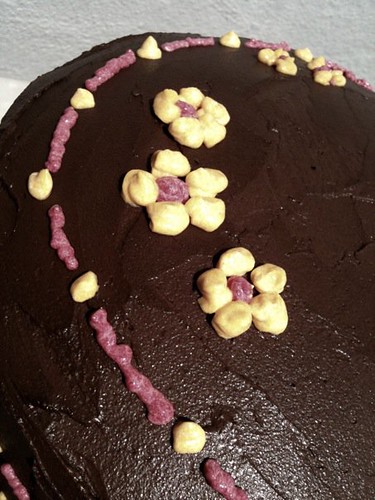
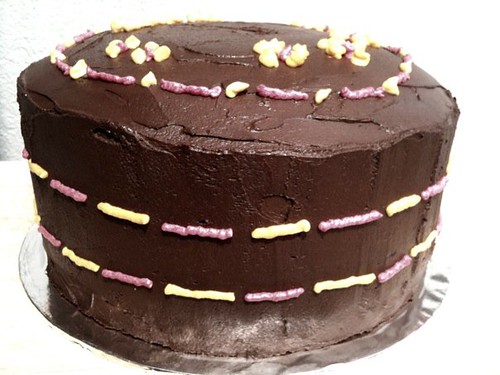
Double Chocolate Layer Cake
Last night I asked Vijay whether or not I should blog about something I haven't personally tasted.

It's not that I don't trust the good people who finished this cake and proceeded to tell me I should open a bakery but them being my good friends and all, what if they just didn't want to hurt my feelings? Bah... he said, even if I make the same cake and taste it myself (1) it wouldn't be exactly the same cake as Najah's and (2) I have my own standards. "Telling people about your experiences is more important...", this coming from a guy who takes 20 minutes to update his Facebook status. Heheh....
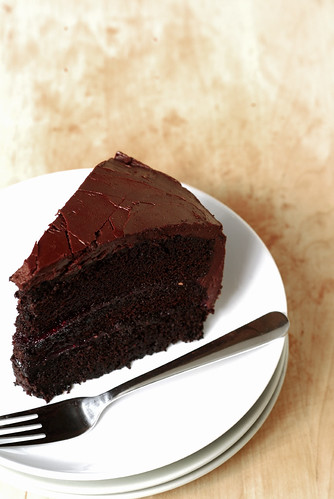
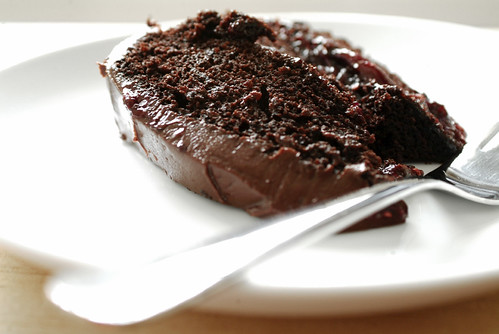
I stumbled on the recipe for this cake a few weeks ago while going through Deb Perelman's archives and bookmarking future items to attempt. While drooling at the photos I went through the entire post to discover that this is a moist, really chocolaty cake, supposedly the best ever one can have. Then I went through the comments and five minutes later decided that I MUST make this cake before I leave.
The final week of my stay in KL sent me in a frantic schedule to finish four cakes in five days (the day I didn't bake was dedicated to cooking a piece of Las Vacas's ribeye steak, recipe to be up soon).
How did the crazy schedule came about? Vanilla pound cake and Nigella's chocolate fudge cake was the original two, the latter to be given to my mother's boss by his (rather bossy I might add) request. This third cake was planned for the family, something to leave them with (and something I can gorge on) before I go. Then I remembered Najah's birthday falling on the weekend and thought - hmmm, this one will be a good present for her, being an epic bestest (yes, I am using the word of the girl who ate it) cake based on the various testimonies of those to tried it. That concluded the necessity of a fourth cake to be made on Friday, albeit a simple one.

This recipe is for two layers of 10" but I only had two 9" tins up till Tuesday. On Wednesday, while shopping for mini loaf tins at Robinsons I accidentally bought another two 9" tins thinking they were 8" ones. Some comments left on Deb's post mentioned experiences of overflowing batter burning the whole house into a smokey mess after cramming it all into two 9" tins (a not so pretty setback which I personally experienced with Monday's vanilla pound cake but that's another post) so I was glad to have the extra tins to make three 9" layers without having to clean and reuse any of the tins.
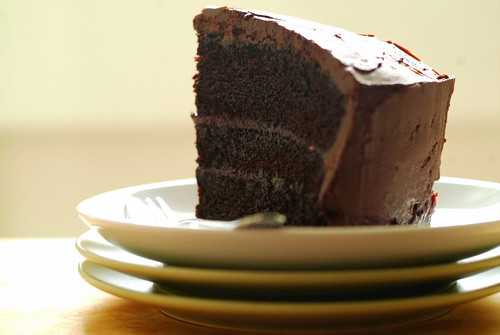
Praying that everything will go well, on Thursday morning I started on the cake. While the layers were baking, the house was filled with such thick chocolate aroma for a whole three hours it was causing me occasional hunger pangs (this was after a big bowl of wantan noodle for lunch). The ganache turned out smooth, shiny and dark. It was evil and alluring, I wanted to bury my face into it. Really. While assembling the cake I was contemplating if I can keep one of the already delicious looking layers for myself before remembering it's best to give to others than to keep for the self (especially since I have earlier asked for divine blessings).
Working with a ganache for the first time, it cooled a little to quickly due to my inexperience. Instead of emptying the whole ice tray into a bowl of water, a handful of ice cubes should do the trick. It took all my (almost forgotten and quite wobbly) food chemistry knowledge to keep myself together and not panic at a pot of hardened cream and chocolate. I mean, what's a birthday cake without frosting??!!!! After leaving it to stand off the cold water while making the colored icing, the ganache softened and darkened to the correct consistency.
Layering the cake took some work. To avoid it from doming (an effect common in small ovens and sometimes caused by varying strength of rising agents), I baked it in a temperature 50 degrees lower than called for, checking on doneness at the one hour mark and the cake was done. The layers were flat, each slightly over 1 1/2 inches tall. They were then flash frozen for 45 minutes before assembly to avoid crumbling when handled and hit with the thick frosting.
As I put the layers together, I thought to myself - hmm, nice tall cake this one, what a way to make a statement! - blissfully unaware that the height of the cake would later cause a small problem. I found the ganache quantity not entirely sufficient for the size of the cake, this is after using my own mixed berries filling for one of the layers. Considerable amount of time was spent scrapping and pasting the frosting around gaping edges of the cake to ensure a presentable outcome. I'm not sure if it's better to bake the cake in 2 9" layers (from what I observed after baking 3 9" layers, overflow is unlikely in my 2 1/2" tall pans) and splitting them into four layers to reduce the height (an approach I decided against at the time considering the threat of overflowing and the absence of a long enough serrated knife to split the cake).
Piping icing over a cake in the sauna like weather of KL city required a few trips of both the icing and the cake to and fro the fridge. It was 35 degrees Celcius, slightly below body temperature. At more than a few points of icing and chilling the cake, I wished I could go into the fridge along with the cake.
By about 5:30 pm, I decided that the cake looks good enough and informed said birthday girl I "sort of" baked her a celebration dessert. When it came to the time of packing the cake into a standard 10" box (the soft kind you get at supermarkets) for chilling, I discovered that the cake was, indeed, too tall. Again, I
Over dinner I came out with the brilliant idea of using the cover of the inept box to make two higher walls on two sides and then cling-wrap the whole box to cover the cake. The problem was a blessing in disguise because the standard cakebox would've been too clumsy for transport. The next morning, a trip to Chang Tung saw me return with a proper hardboard box and some other extra purchases deemed necessary for future baking projects (I can't have gone all the way there just to buy a box can I?)
After sending the cake off Saturday morning, I worried for the rest of the day (the other half kept getting the same question - What if it's not nice baby? ... and it's soooo big! Her birthday will be ruined, ruined!). It's one thing to bake a first-time cake for a friend who didn't ask for it, it's another to give her a humongous one and possibly spoil her birthday feast if it's not up to par. Alas, an evening Tweet from the birthday girl's sister and later Facebook updates from the birthday girl herself assured my almost mental state that the sinful looking, almost 10 pounds heavy cake, indeed tasted good.
This is, by far, my bestest baking experience.
Update 10 May 2010: Upon making this cake the second time, I finally tasted it. This time I used the coveted Valrhona 68% bittersweet chocolate. The words I want to use to describe it are simply inappropriate for the public.
Instead, let me just leave you with this.
Double Chocolate Layer Cake
Cake recipe from Deb's adaptation, mixed berries filling recipe my own since I had some sauce lying around.
The recipe below is for 2 10-inch layers filled and coated in chocolate ganache. My adaptation was to bake three 9" layers which resulted in a tall cake. Unless making the suggested 2 10" layers, make the full recipe of the ganache frosting even if using the berry filling between layers and use accordingly.
For cake layers:For ganache frosting and filling:
- 3 ounces fine-quality semisweet chocolate
- 1 1/2 cups hot brewed coffee
- 3 cups sugar
- 2 1/2 cups all-purpose flour
- 1 1/2 cups unsweetened cocoa powder
- 2 teaspoons baking soda
- 3/4 teaspoon baking powder
- 1 1/4 teaspoons salt
- 3 large eggs
- 3/4 cup vegetable oil
- 1 1/2 cups well-shaken buttermilk
- 3/4 teaspoon vanilla extract
For mixed berries filling:
- 1 pound fine-quality semisweet chocolate (I used Baker's)
- 1 cup heavy cream
- 2 tablespoons sugar
- 2 tablespoons light corn syrup<
- 1/2 stick (1/4 cup) unsalted butter
- 6 ounces (1 pack) of fresh blueberries
- 12 ounces (2 packs) fresh raspberries
- 1 1/2 cups sugar
- 2 tablespoons lemon juice
- 2 tablespoons cornstarch
Special equipment: two 10- by 2-inch round cake pans (I used three 9" springform tins).
Make cake layers: Preheat oven to 300°F and grease pans. Line bottoms with rounds of wax paper and grease paper.
Finely chop chocolate and in a bowl combine with hot coffee. Let mixture stand, stirring occasionally, until chocolate is melted and mixture is smooth.
Into a large bowl sift together sugar, flour, cocoa powder, baking soda, baking powder, and salt. In another large bowl with an electric mixer beat eggs until thickened slightly and lemon colored (about 3 minutes with a standing mixer or 5 minutes with a hand-held mixer). Slowly add oil, buttermilk, vanilla, and melted chocolate mixture to eggs, beating until combined well. Add sugar mixture and beat on medium speed until just combined well.
Divide batter between pans and bake in middle of oven until a tester inserted in center comes out clean, 1 hour to 1 hour and 10 minutes.
Cool layers completely in pans on racks. If not using springforms, run a thin knife around edges of pans and invert layers onto racks. Carefully remove wax paper and cool layers completely. Cake layers may be made 1 day ahead and kept, wrapped well in plastic wrap, at room temperature.
Make frosting: Finely chop chocolate. In a 1 1/2- to 2-quart saucepan bring cream, sugar, and corn syrup to a boil over moderately low heat, whisking until sugar is dissolved. Remove pan from heat and add chocolate, whisking until chocolate is melted. Cut butter into pieces and add to frosting, whisking until smooth.
Transfer frosting to a bowl and cool, stirring occasionally, until spreadable (depending on chocolate used, it may be necessary to chill frosting to spreadable consistency). I found that stirring this over a bowl of ice water did a great job of cooling it off quickly and evenly.
Spread frosting between cake layers and over top and sides. Cake keeps, covered and chilled, 3 days. Bring cake to room temperature before serving.
Make the berries filling: In a saucepan, heat the berries and sugar. Stir until sugar dissolves and berries fall apart. Dissolve the cornstarch in a little water. On high heat, stir in the starch solution. The sauce will thicken quickly.
Let sauce cool down to room temperature. Puree the sauce in a blender or food processor. Chill to thicken more before spreading it thinly between cake layers.


Continue reading Double Chocolate Layer Cake
Life Is Great explores the incredible world of food and cooking. We hope to share with you our most delicious moments and inspirations.
“Just like becoming an expert in wine–you learn by drinking it, the best you can afford–you learn about great food by finding the best there is, whether simply or luxurious. The you savor it, analyze it, and discuss it with your companions, and you compare it with other experiences.”
Julia Child (Mastering the Art of French Cooking)
“Life is short. Live your dream and share your passion.”
RESOURCES
RECIPES

CAKE ORDERS

EATING OUT
FOOD READS
SUBSCRIPTION
RECENT RECIPES
- Gooey Cinnamon Cake
- Chinese Crispy Roast Pork Belly (Siu Yuk 烧肉)
- ABC Soup (罗宋汤)
- Kong Bak Pau (扣肉包)
- Pandan Chiffon Cake (Improved)
- Crispy Fried Egg
- Tamago Kake Gohan (卵かけご飯)
- Strawberry Pie
- One Pot Chicken Rice
- Bak Chor Mee (肉脞面 - Minced Pork Noodle)
- Hakka Salted Egg Steamed Pork (咸蛋蒸猪肉)
RECENT TRAVELS
- Hong Kong Part III
- Hong Kong Part II: Zongzi/Bakchang (粽子/肉粽)
- Caffè HABITŪ (the table) at G.O.D. Causeway Bay, Hong Kong
- Hong Kong Part I
- Australia 2010 Part 1: Melbourne
- Bourke Street Bakery, Sydney
- Il Fornaio, St Kilda
- Queen Victoria Market, Melbourne
ARCHIVES
FEEDBACK
Recent Comments